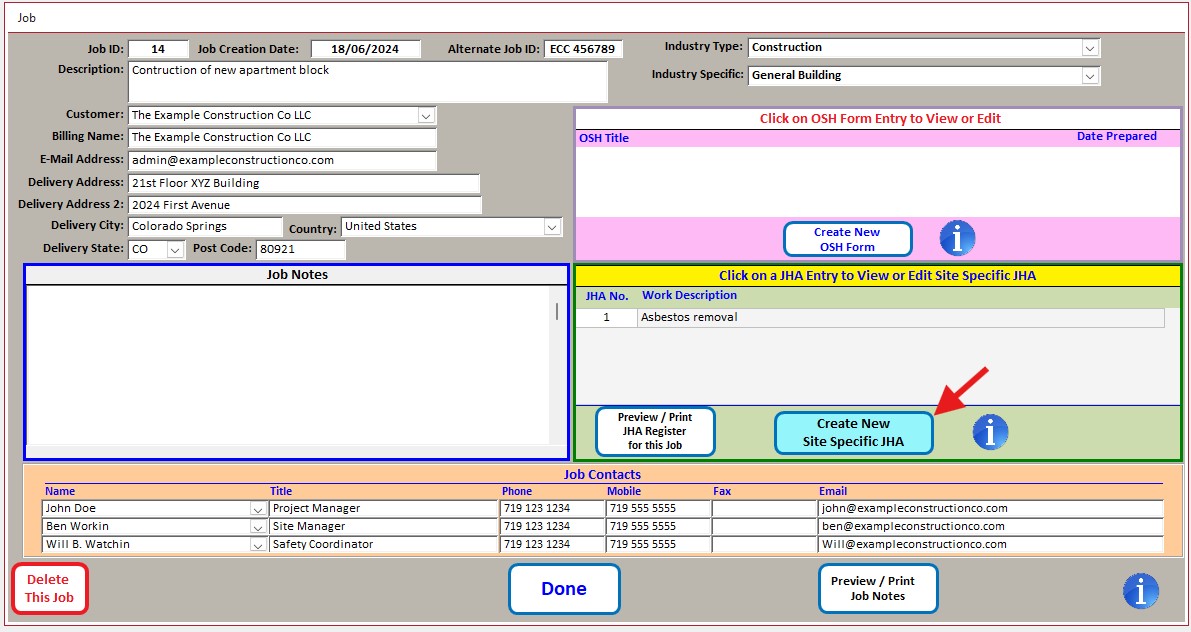
Create a site Specific JHA/JSA from the Job Form
New JHA/ JSA/ JSEA
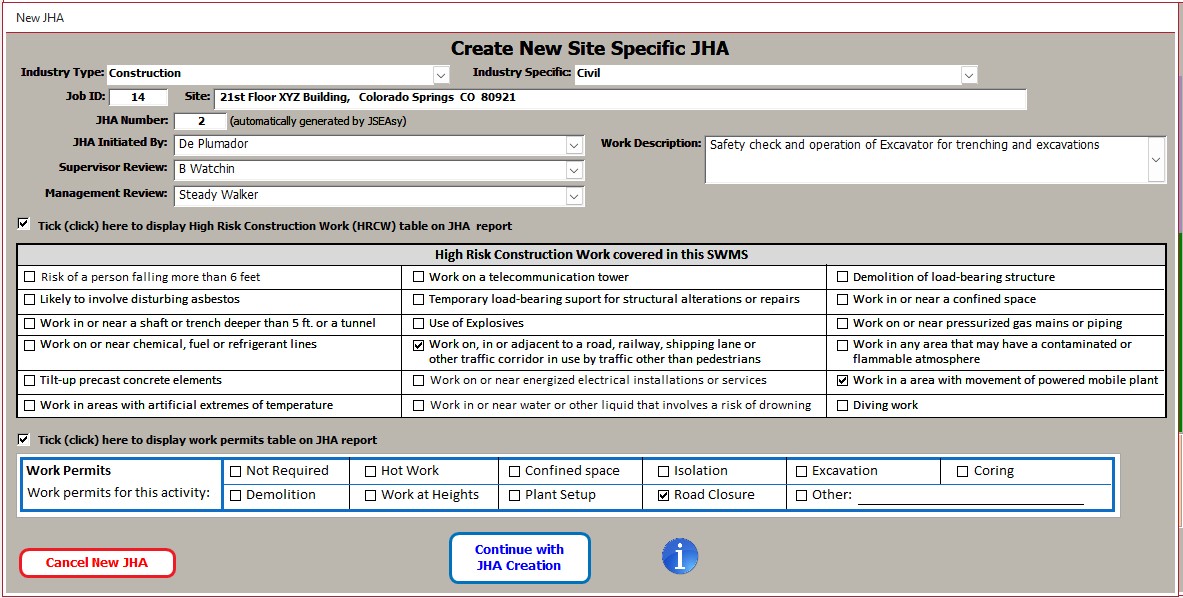
Follow these steps when creating a new Site Specific JSA/ JHA
JSEA/JHA Initiated By:
This is normally the main person on site for this project. You can select from the dropdown list which displays from the list of employees or subcontractors entered into JSEAsy, or you can type in a name
Supervisor Review:
This is normally the supervisor for this project. You can select from the dropdown list which displays from the list of employees or subcontractors entered into JSEAsy, or you can type in a name
Management Review:
This should be someone in senior management or a PCBU. You must select from the dropdown list which displays from the list of employees or subcontractors entered into JSEAsy.
Work Description:
Enter in a description of the work (or Job) to be undertaken
High-Risk Construction Work Table
The use of this table is optional. If you wish to display this table on your completed JHA report, tick the box to display.
Select the high-risk activities appropriate to your job.
Work Permits
The use of this table is optional. If you wish to display this table on your completed JHA report, tick the box to display.
Select the work permits appropriate to your job.
Continue with JHA Creation
Click on this button to take you to the next window
JHA (JSA,JSEA, JHA) details and signoff
Hint
When you enter in an employee or subcontractor, tick the box “Authorized for supervisors review” to have their name displayed when selecting from the supervisor’s review list. Tick the box “Authorized for Management review” to have their name displayed when selecting from the supervisor’s review list
Site Specific JHA details and Signoff list
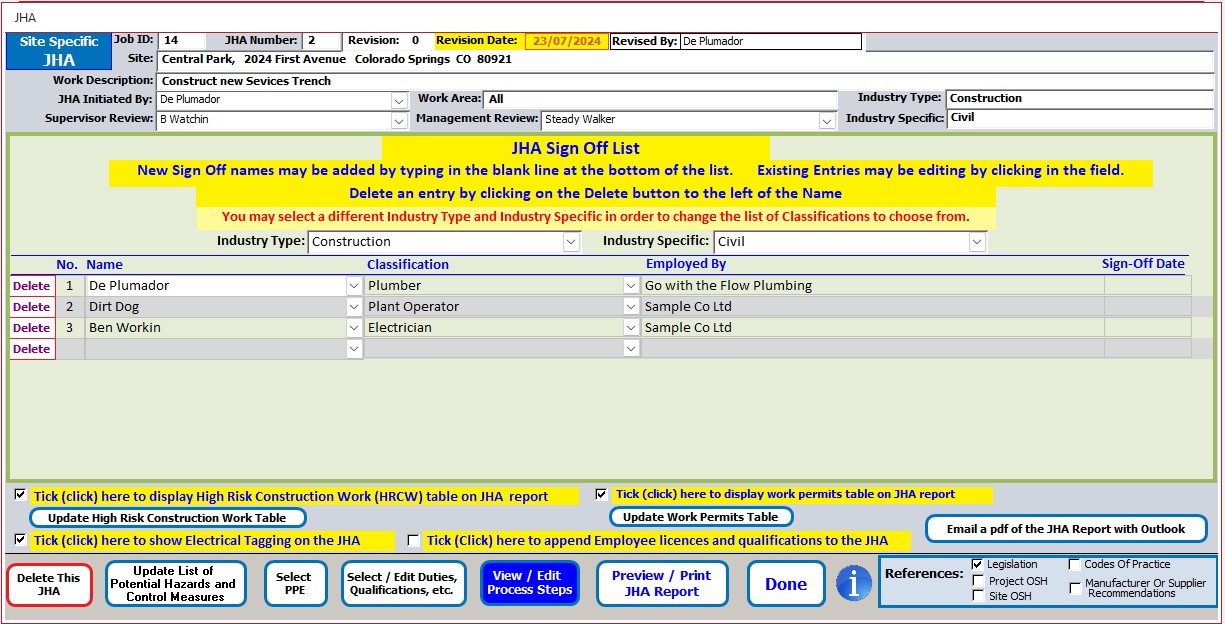
From here you can make amendments to your SWMS revision, and revision date. You can also update/ change the initiated by and reviewed by people here.
Once you have added employees and subcontractors to the application, you can select from the dropdown list, all of those involved in the task/ job. Those involved should sign to confirm that they have been consulted in the development of the JHA and accept and will implement the requirements of the JHA and control measures.
Tick (click) to append employee licenses and qualifications to the Site-Specific JHA. If you have entered in employee licenses and qualifications in the Employee or Subcontractors form and tick this box, a list of their licenses and qualifications will appear on the site-specific JHA. If you do not tick this box, then they will not appear.
From this window you can also:
Select/ Edit Duties and Responsibilities, Qualifications, References applicable etc.
View/ Edit Process steps (this is where you build the steps required to undertake your job from start to finish.)
Preview/ Print the Site-Specific JHA/JSA
From the print preview, you can select from your list of installed printers to print to hard copy, or print to pdf to save a copy to your PC. From there you can attach the pdf to an email
Hint
If you have entered in an emergency contact for an employee or subcontractor, their name, relationship and phone number will appear on the SWMS if you tick the append Employee licenses and qualifications. This is extremely helpful in the event of an emergency.
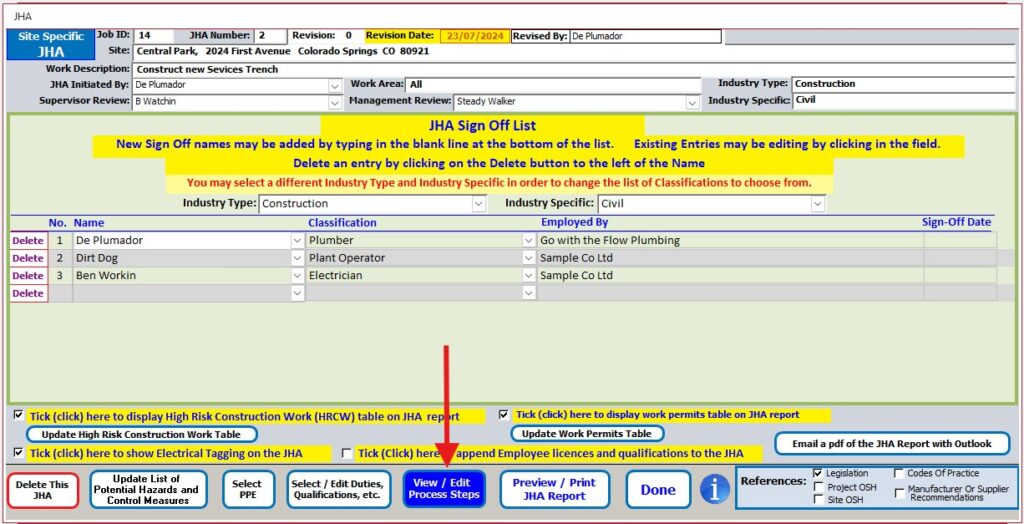
View Edit Site Specific JHA process steps
Click on, “View edit Process steps at the bottom to continue to the JHA process steps
Enter in a Main Process Step or Insert and existing JHA template
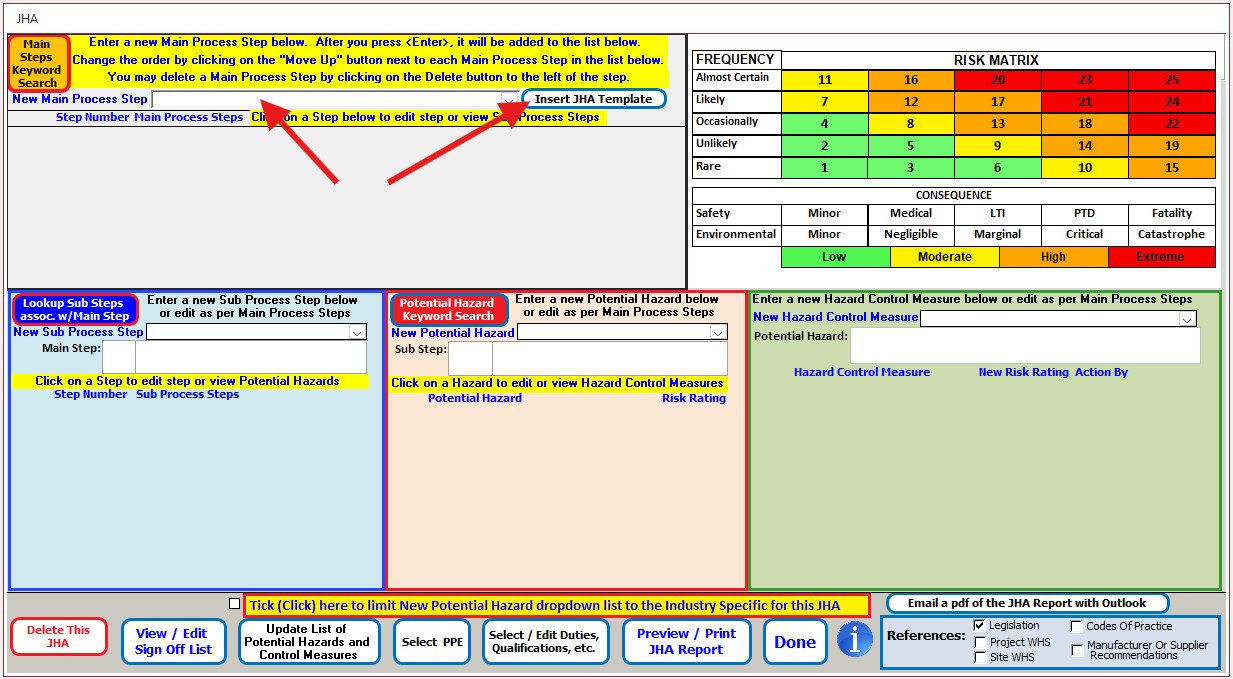
This is where you enter in details for your site specific JHA.
You can build your site specific JHA from scratch, however it is usually easier to build it by inserting templates of the steps that you are going to take in the order in which you are going to take them.
- Insert an existing JHA Template into your site specific JHA
- Click on the insert JHA template button on the RHS of “New Main Process Step”
- After inserting a JHA template if you click on the Main process step, it will select it and highlight in green
- When a Main Process step is highlighted in green the associated sup process step will also be highlighted in green
- If you click on a potential hazard associated with the sub process step, it will be highlighted in green, and the related control measures will be displayed
- From there you can add or delete any entries (main or sub process steps, potential hazards, or control measures.)
- click on View/ Edit Signoff List to take you back to the previous window
- Select PPE required for your job
- Select/ Edit the duties and responsibilities, Licensing, training requirements etc.. for your job
- if you find an error in the list of Potential Hazards and control measures you can edit them here
- Preview/Print your completed JHA
- Done will take you back to the job form.
- References. Tick any references you want to add to your JHA
Watch a Video Demonstration on creating a Site specific JHA using existing templates (5 min 28 sec)
Hint
If you are going to make a JHA for a task that you are like to do over again, you are better off making a template that contains all of the job steps, and then inserting tat template into your site specific JHA. (Note you can not copy an existing site specific JHA into another job.)
A good example of this is to look at the Bricklaying to new project home template.
- Go to the main options
- Select an existing “JHA” template
- Open for read only
- Type in Brick in the bottom Keyword search box (Search all industry types and all Industry Specifics)
- Click in the line that say, “Bricklaying to new project home”
- Click ok
- Review the template
Look at creating a new “JHA” template for information and tips on creating a new JHA template

